Overview
Learn to attach and maintain documents and photos for equipment records in PeopleSoft Asset Management with this step-by-step guide.
This guide demonstrates how to attach and maintain documents and photos related to an equipment record in PeopleSoft Asset Management.
How to Navigate to Equipment Records
From the Asset Basic Information page, you can attach and store documents along with a current photo related to the equipment record. Photos are displayed in equipment searches. Only one photo can be attached at a time. A new photo will replace the current photo.
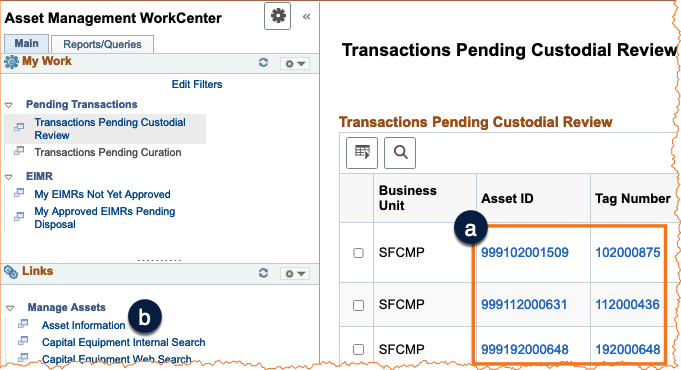
- Navigate to the Asset Management WorkCenter and click on a pending transaction for custodial review or curation to open the Asset Basic Information page a.
-OR
If you do not have any pending transactions:
- Navigate to the WorkCenter Links section and select the Asset Information link under Manage Assets b.
- Search for an existing asset by entering the applicable search criteria to open an equipment record. (not shown)
How to Attach and Delete Documents
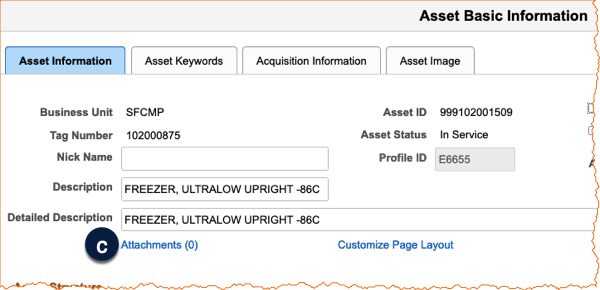
- From the Asset Basic Information page, click the Attachments hyperlink. The number in parentheses indicates the number of documents currently attached to the record c.
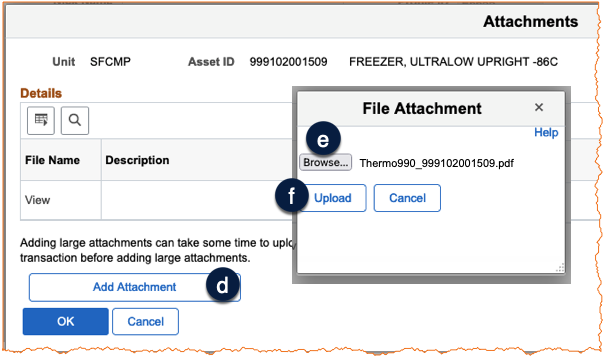
- The Attachments window displays. Click Add Attachment d.
- The File Attachment pop-up displays. Click Browse e.
- Your system's file browser window displays (not shown). Search for and select the applicable file and click Open. The name of the file will appear in the File Attachment window.
- Click Upload f.
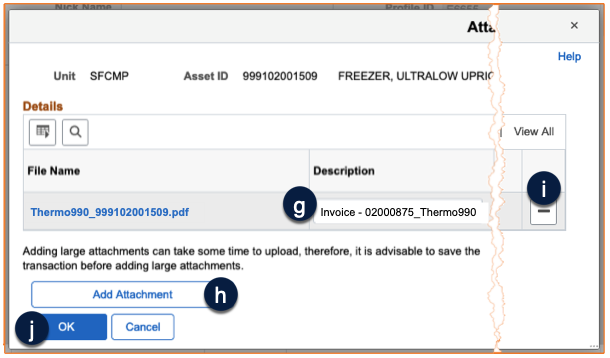
- Enter a sensible Description for the content being attached g.
- Click Add Attachment h.
- Repeat steps 1-7 to add as many attachments as necessary.
- To delete an attachment click - at the end of the row for the attachment you want to delete i, and follow on-screen prompts to confirm the deletion.
- When you are done adding/removing attachments, click OK j.
How to Set, Replace, or Delete an Equipment Photo
To add the image to the equipment record:
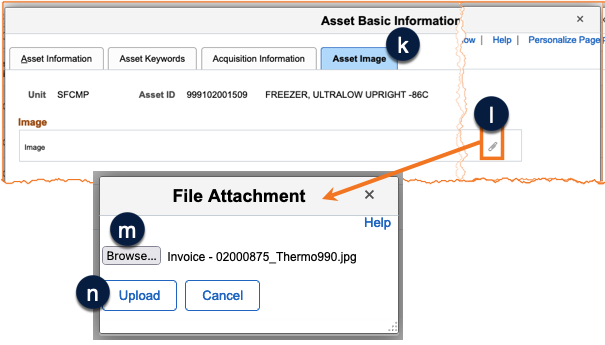
- From the Asset Basic Information page, click the Asset Image tab k.
- Click the paperclip icon l.
- The File Attachment window displays. Click Browse m.
- Your system's file browser window displays (not shown). Search for and select the applicable photo and click Open. The name of the file will appear in the File Attachment window.
- Click Upload n. The image of the equipment record is now displayed.
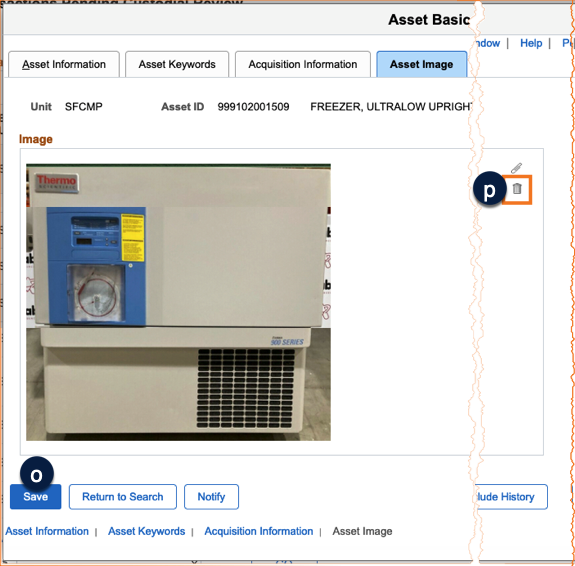
- Click Save o. The image for the equipment record is saved and will be visible in equipment searches.
To replace the current image, repeat steps 1 through 6.
To delete an image from the equipment record:
- Click the Trash Can Icon in the image window p.
- Click Save o. The image is removed immediately from the equipment record.
One way to prepare a photo for an equipment record is to take a photo of the equipment using a cell phone or other device. Then, email the photo to your work email. Finally, save the photo to an easy-to-locate folder to attach to the PeopleSoft equipment record.