Overview
Provides steps for Access Administrators to validate current user security for all active UCSF PeopleSoft Financials and/or UCPath users.
Every six months, UCSF engages in a process to validate the current user security for all active users of PS Financials and/or UCPath. There is an online system to review and validate each user’s access individually. Continue reading for more information about the process and how to use the system.
For more information or if you have any questions: Contact IT Application Security Support at [email protected]
User Verification Process: Step-by-Step
Step 1: Watch Your Email!
You will receive an email when the User Verification process is ready to begin. This email contains a link you can follow to access the online system. In addition to a brief introduction to the process, the email includes the number of users you have been assigned to review, as well as a link to the online system. Clicking that link should bring you to the page where you can review your assigned users’ access.
Other ways to get to the online system: Log into PeopleSoft Financials, and then use the Navigator to reach following location: Department Role Maintenance > User Verification > User Verification Review.
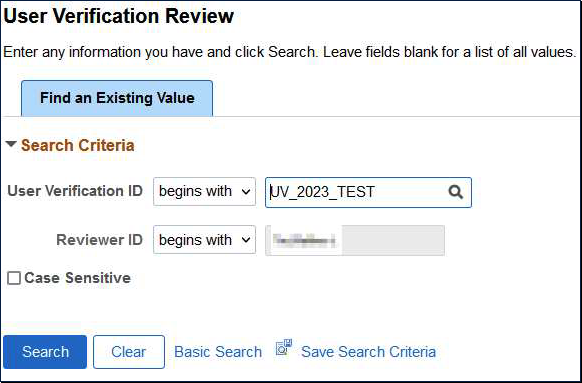
You will be presented with the User Verification Review page, which will be populated with the current User Verification instance. Just click Search to begin your review. *Note that it is possible to see previous reviews. See the Additional Functionality (Optional) section below.
Step 2: Review Your Assigned Users
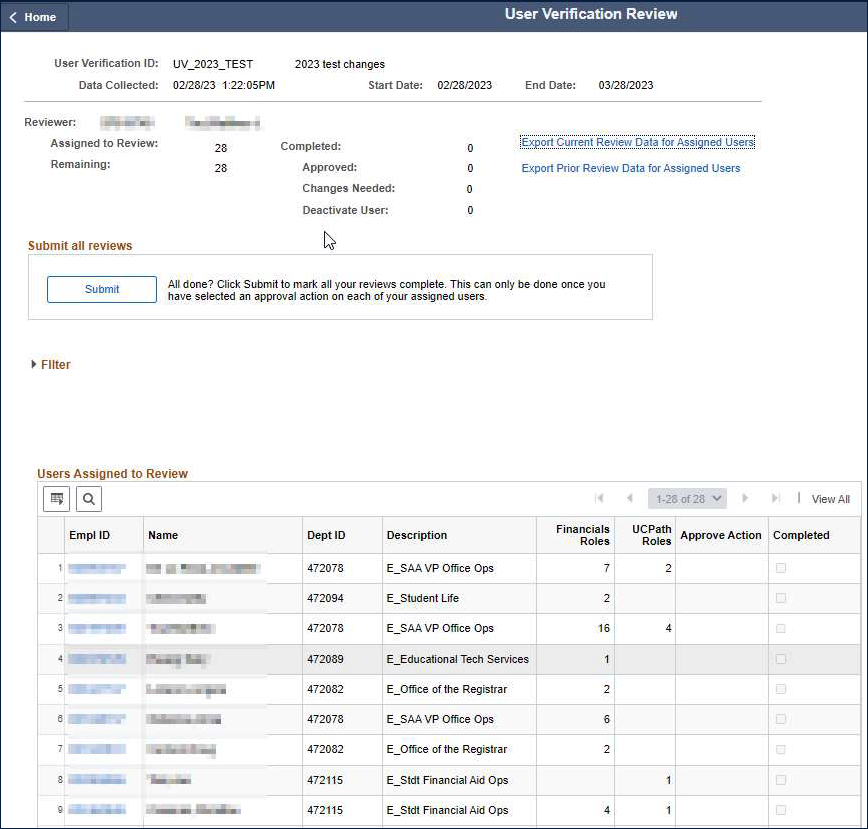
The User Verification Review page should open with a list of your assigned users in a table at the bottom of the page.
For each of the users you are assigned, click the Empl ID hyperlink to view that user’s current access.
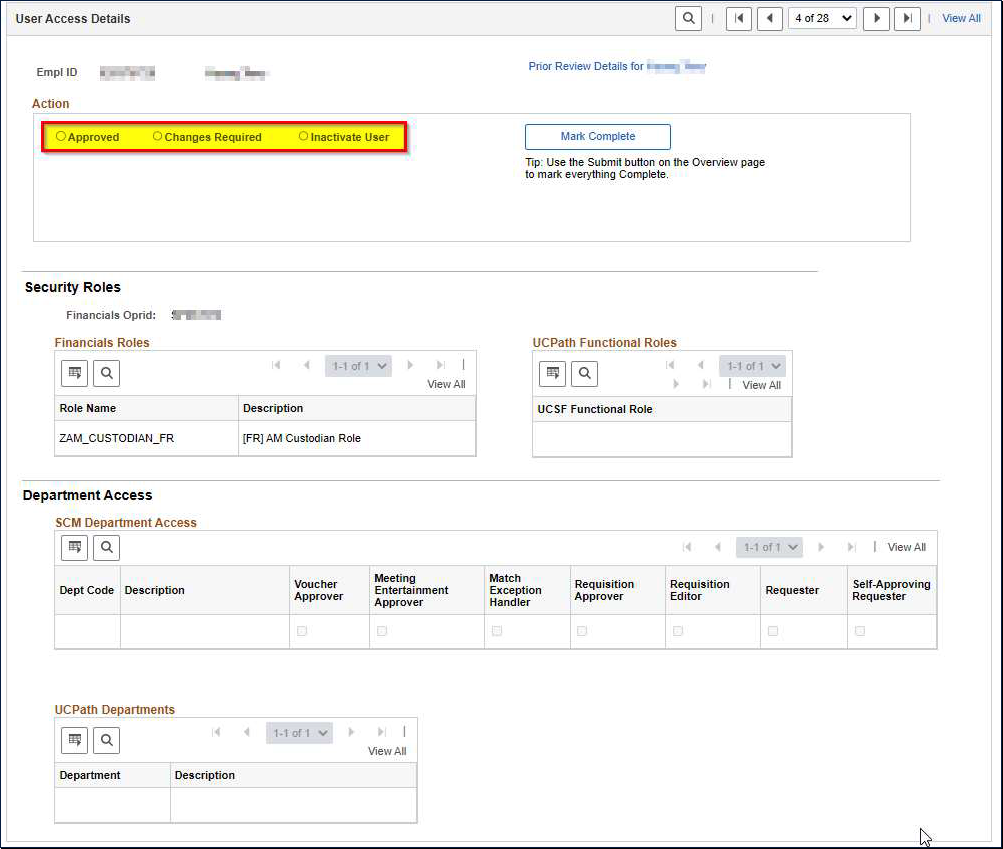
After clicking the Empl ID link, you can review the current access of the user. This information is provided in the “Security Roles” and “Department Access” sections of the page. Once your review is complete, you will mark an appropriate selection in the top area of the page (under “Action”), depending on your review decision.
If this user has been reviewed in the prior review cycle, click Prior Review Details for username hyperlink in the upper right to display their prior review details. If this user was not reviewed in the prior review the hyperlink will be disabled.
Choose one of the following review options:
- Approved – All access appears accurate and appropriate for this user
- Changes Required – An issue has been identified with the user access
- Inactivate User – User account should be inactivated (either PeopleSoft Financials, UCPath, or both – provide complete details in the access change request form)
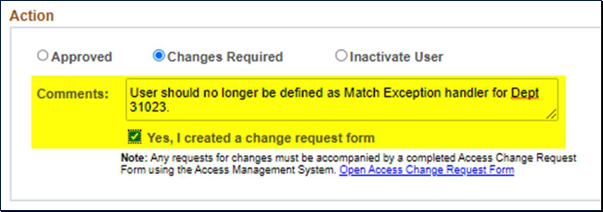
Note: If your selection is anything but “Approved”, an Access Change Request Form should be completed as part of this process to ensure necessary access changes are made. Please enter comments in the area provided and click the checkbox once the change request form has been submitted.
Remember to click Save as you complete your reviews to ensure your selections are entered into the system.
Step 3: Submit Your Reviews When Complete
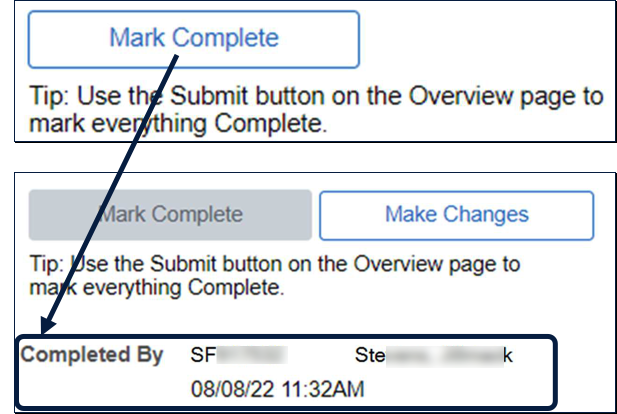
You will notice on the review page for each user a “Mark Complete” button.
By clicking that button, you indicate that your review is complete for that user and the system is stamped with the date and time of your review.

Alternatively (and as mentioned in the tip below the button described above), you may click the Submit button on the main page once all your reviews are complete - this marks all your reviews as complete at once.
Note: Use either method. Choose the approach that best fits your workflow. For those with many reviews, it may be helpful to mark individual reviews complete as you move through them to track your progress and check more easily along the way. For others, the Submit button may be the faster, easier option. Just remember that your review is not complete until all your reviews are submitted!
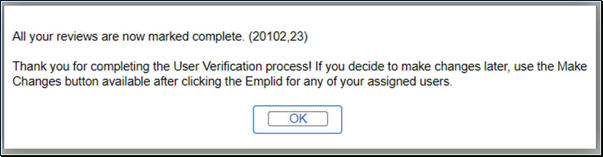
Once everything has been submitted, you will see the message:
"All your reviews are now marked complete. (20102,23)
Thank you for completing the User Verification process! If you decide to make changes later, use the Make Changes button available after clicking the Emplid for any of your assigned users."
Click OK to dismiss the message.
Additional Functionality (Optional)
Using the Filter
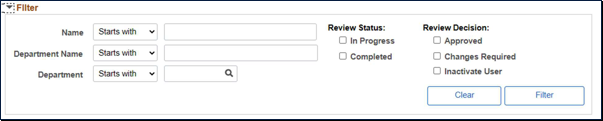
For those of you with many users to review, the optional Filter area may be useful. Use this work with a smaller set of users by filtering on one of the provided fields, including Name, Department, or to only review those of a specific status (e.g., those that have not been completed).
To view the filter, click the text “Filter” on the main page. This expands to show all Filter fields.
Then, just enter any additional criteria and click Filter to present a filtered list of users in the table below.
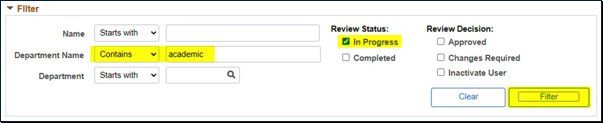
For example, to review only users assigned to a home department containing the text “academic” (text searches are not case-sensitive) and only those that have not been submitted, you would enter the following into the Filter area and click Filter.
Done using the filter? Click Clear to clear any filter criteria you provided, and then click Filter again, and all your assigned users will be visible again.
Exporting Current Review Data

Some of you may wish to review the security access of your assigned users offline. One scenario where this could be useful is enlisting the help of an additional party in the review of your assigned user data. This export also includes your approver comments, as well as your selected approval option (Approved, Deactivate User, or Changes Needed). This allows you to share additional notes along with the export or document your selections should you choose to export after the completion of the review cycle.
To get to this information, click the Export Current Review Data for Assigned Users hyperlink near the top of the review page.

Clicking this link should open a new tab with all the data provided in a grid. Click the Excel Spreadsheet link to download an Excel spreadsheet with this same information.
Tip: The default spreadsheet format from PeopleSoft uses extremely wide columns. You will likely want to resize the columns to something much smaller to make the content easier to view:
- Save the spreadsheet as a new name to enable edits.
- Use Ctrl-A to highlight all cells.
- Right-click in the column header area and choose “Column Width” and set the width to 40.
- Manually resize individual columns to your preference.
Exporting Prior Review Data

Some of you may wish to review the previously reviewed security access of your assigned users offline. One scenario where this could be useful is comparing a user's current security access with their previously reviewed security access. This export includes the user's prior review results. It includes the prior approver name (your current assigned user may have been reviewed by a different reviewer in the prior review), prior approval date, prior approver comments, and the prior approval selection (Approved, Deactivate User, or Changes Needed).
To get to this information, click the Export Prior Review Data for Assigned Users hyperlink near the top of the review page.

Clicking this link should open a new tab with all the data provided in a grid. Click the Excel Spreadsheet link to download an Excel spreadsheet with this same information.
Tip: The default spreadsheet format from PeopleSoft uses extremely wide columns. You will likely want to resize the columns to something much smaller to make the content easier to view:
- Save the spreadsheet as a new name to enable edits.
- Use Ctrl-A to highlight all cells.
- Right-click in the column header area and choose “Column Width” and set the width to 40.
- Manually resize individual columns to your preference.
Viewing Prior Reviews
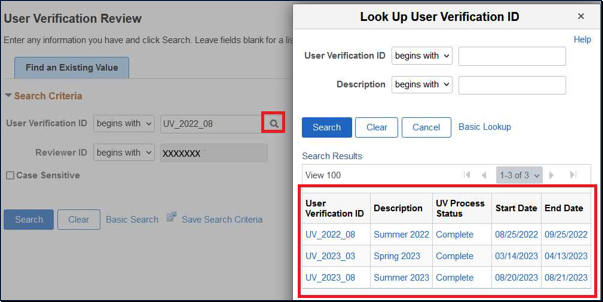
From the User Verification Review page, select the User Verification ID search icon to find the prior review you wish to view.
Log into PeopleSoft Financials, and then use the Navigator to reach the following location: Department Role Maintenance > User Verification > User Verification Review.
If you are already inside the User Verification Review page, select the Return to Search button to reach the Look Up User Verification ID page.
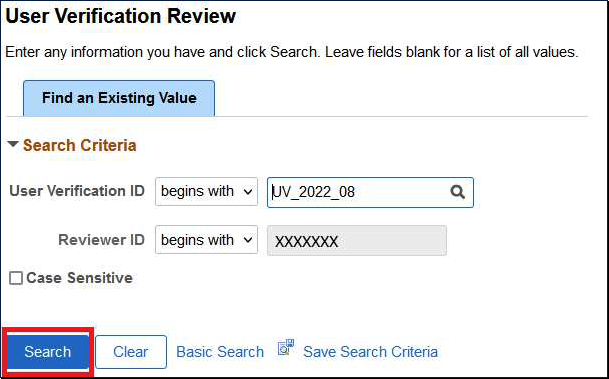
For this example, we will select UV_2022_08 to view the completed reviews from the Summer 2022 review cycle.
Once you have the instance you wish to review, select the Search button.

You may now export the review data from the selected User Verification instance by clicking the Export Current Review Data for Assigned Users hyperlink.

Clicking this link should open a new tab with all the data provided in a grid. Click the Excel Spreadsheet link to download an Excel spreadsheet with this same information.
Tip: The default spreadsheet format from PeopleSoft uses extremely wide columns. You will likely want to resize the columns to something much smaller to make the content easier to view:
- Save the spreadsheet as a new name to enable edits.
- Use Ctrl-A to highlight all cells.
- Right-click in the column header area and choose “Column Width” and set the width to 40.
- Manually resize individual columns to your preference.
Viewing Procurement Department Users Being Reviewed by Another Access Administrator

Some of you may wish to view the Procurement Dept users who are being reviewed by another AA. This can be useful for finding which users are assigned to the Procurement Dept under your responsibility but are not within a home department you are responsible for reviewing. For example, Bob Smith is assigned to home department 123456, which you do not review, but is assigned as a Requester for department 234567, which you do review.
Note that if you do not have users from outside your home department assigned to the Procurement Departments under your responsibility, then you will not see any differences in your user verification screen. If this does apply to you, then you will see the View Procurement Dept Users and Export Procurement Dept Users Being Reviewed by Another AA links.
To access this information, click the View Procurement Dept Users hyperlink near the middle of the User Verification Review page.

Additionally, for external use, you can export the Procurement Dept users who are being reviewed by another AA by selecting the Export Procurement Dept Users Being Reviewed by Another AA link, which is located near the top of the page.

Clicking this link should open a new tab with all the data provided in a grid. Click the Excel Spreadsheet link to download an Excel spreadsheet with this same information.
Tip: The default spreadsheet format from PeopleSoft uses extremely wide columns. You will likely want to resize the columns to something much smaller to make the content easier to view:
- Save the spreadsheet as a new name to enable edits.
- Use Ctrl-A to highlight all cells.
- Right-click in the column header area and choose “Column Width” and set the width to 40.
- Manually resize individual columns to your preference.
Note that if you wish for someone within a Procurement Dept under your responsibility to be removed, but are not assigned to the person, then to remove their access, you would want to contact the Reviewer listed in the Reviewer Name column.
Additional Resources
More questions? We are here to help!
For help with any additional questions or concerns on the process, reach out to IT Application Security Support at [email protected].