An open shift is a shift that is scheduled for a job, date, and time, but is not assigned to an individual. You can create open shifts as placeholders for shifts that you need to fill to meet your scheduling requirements. This guide provides managers with three methods that can be used to create open shifts. The three methods detailed are manually creating the open shift, typing the start and end times, and by using a template.
Option 1: Create a Shift with All Options Available
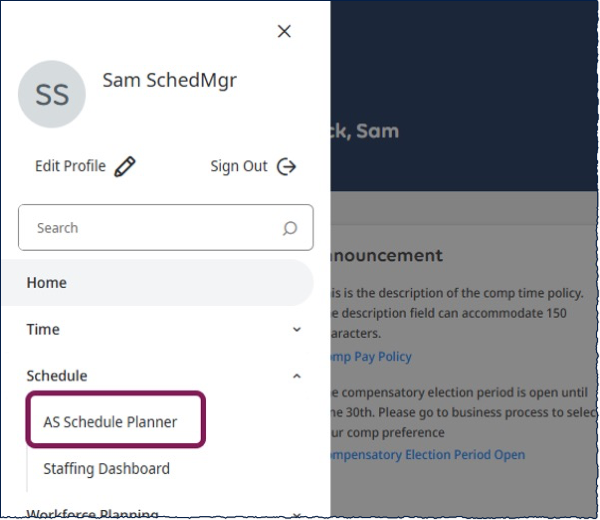
- From the Home Page, open the Main Menu in the top left corner of the screen. Expand the Schedule section and select AS Schedule Planner.
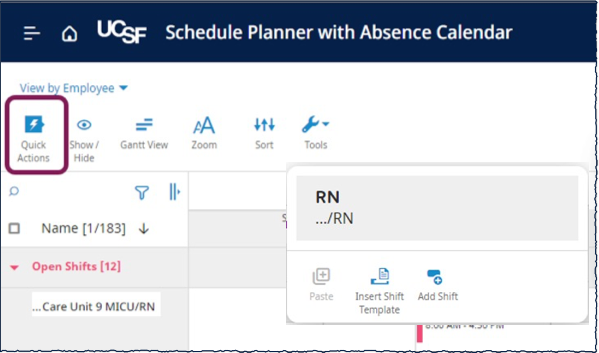
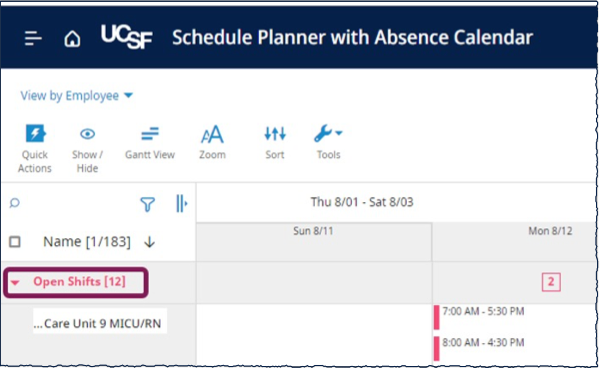
- From the Schedule Planner page, expand the Open Shifts area.
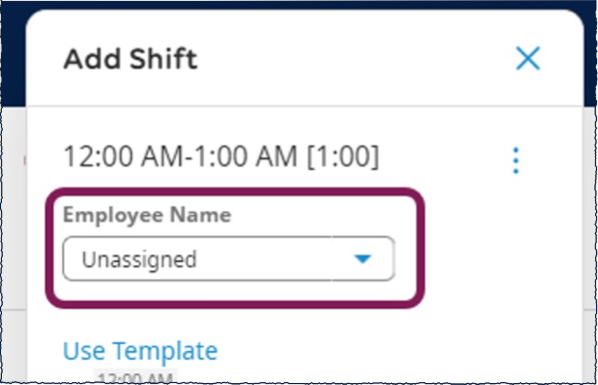
- On the Open Shifts row, right-click a date cell in the schedule. In the shift glance, select Add Shift.
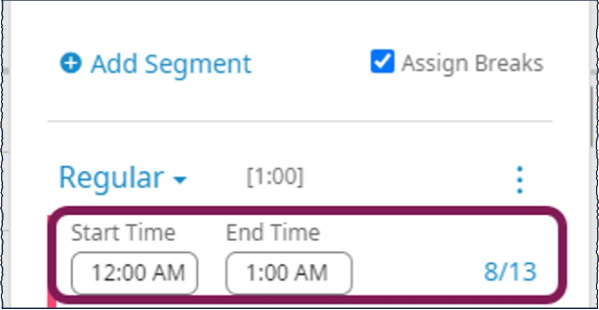
- This opens the Add Shift slider. Confirm that Unassigned appears in the Employee Name field.
- Enter a Start Time and an End Time.
- You may select Transfer to display the transfer list if needed. Transfers can be used to move either part of or the entire shift to another job, department, or cost center. If the transfer you want does not appear on the menu, select More to define the transfer. The Transfer panel appears. Select the transfer details for the open shift. Select Add Business Structure, then choose either Jobs With Location or Jobs, Select Ok, and Apply.
- Select Apply.
- Select Save.


Option 2: Create an Open Shift by Typing in Table View
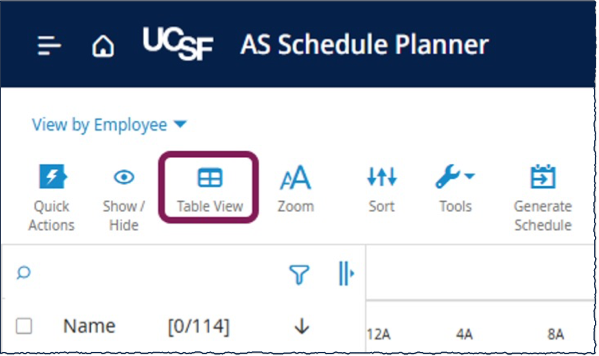
- From the Schedule Planner page, select Table View. If the button says Gantt View, then you are already in the Table View and you can proceed to the next step.
- Expand the Open Shifts area by selecting the expand arrow next to the label for the Open Shifts row.
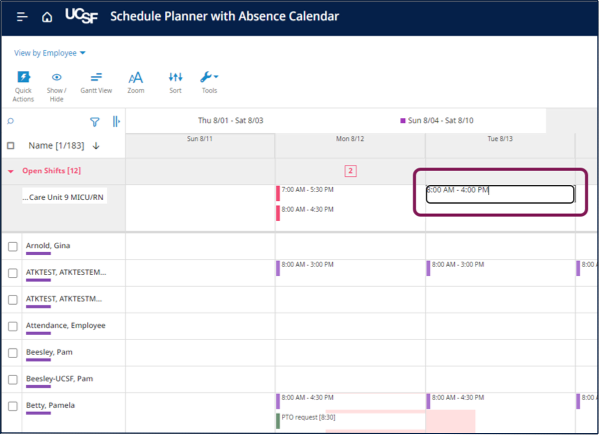
- Select a cell in the job row and enter one of the following: the name of a shift template (Day 12 as an example) or the start and end time separated by a hyphen (8a-4p as an example).
- Select Save.
Option 3: Create an Open Shift from a Template
- From the Schedule Planner page, expand the Open Shifts area.
- Select Quick Actions.
- Select Insert Shift Template.
- Select the applicable shift template from the list. You can use the Search field to locate the appropriate shift template from the list if needed.
- In the appropriate job row, select the date cells to create open shifts.
- Select Quick Actions again to stop creating open shifts.
- Select Save.