This guide is intended for managers in MyTime Advanced Scheduling departments and provides step-by-step instructions for adding a pay code, transferring an employee, assigning an employee to an open shift, and adjusting the start and end times of a shift in the Staffing Dashboard.
You can add pay codes in the Staffing Dashboard when making daily changes to the schedule, such as when employees call out sick. The scheduling updates also appear in the Schedule Planner and employee timecards and are visible to the employees’ managers. You can also add shift assignments and additional open shifts needed to maintain coverage requirements in the Staffing Dashboard. The schedule updates also appear in the Schedule Planner and employee calendar so that they are visible to the employees and their managers.
In the Staffing Dashboard you can drag and drop employees to transfer them to different locations when balancing the daily schedule. The transfers also appear in the Schedule Planner and employee calendar so that they are visible to the employees and their managers.
Shift times can be adjusted to balance coverage and maintain the schedule. This can be useful when employees need to stay late or leave early. The schedule updates appear in the Schedule Planner and employee calendar so that they are visible to the employees and their managers.
How to Add a Pay Code
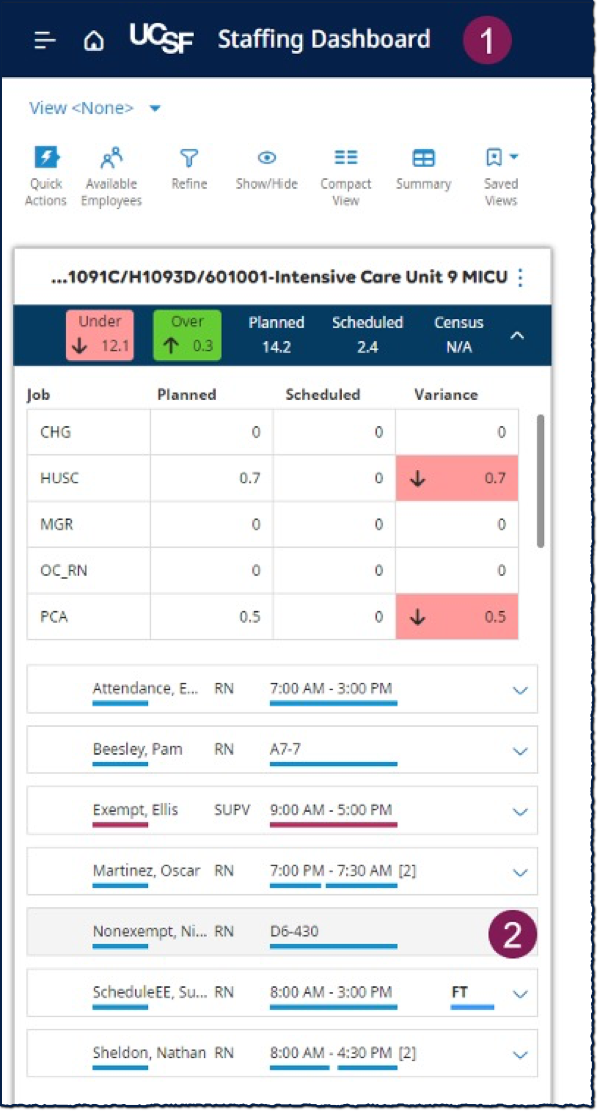
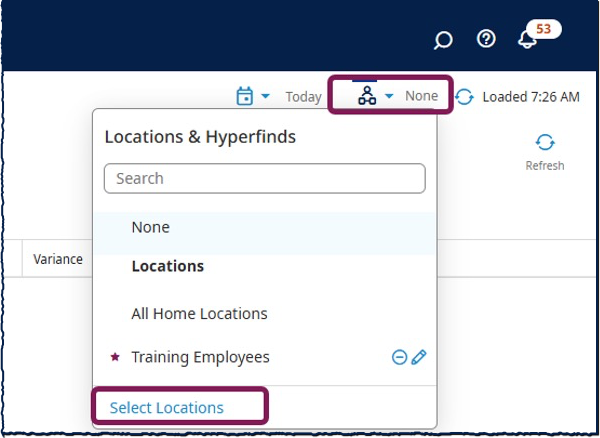
- In the Staffing Dashboard Summary page, select the location(s) and job(s) that you want to work with.
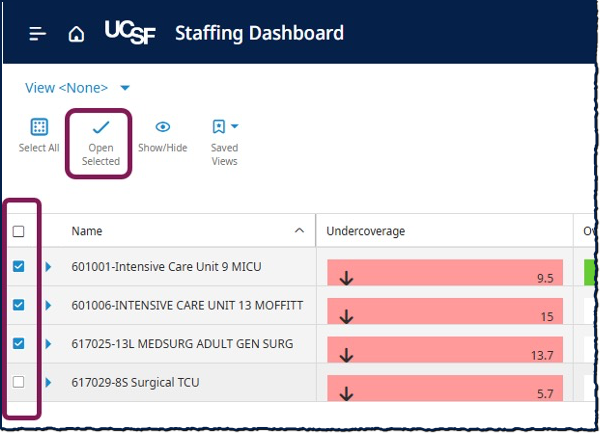
- Select Open Selected.
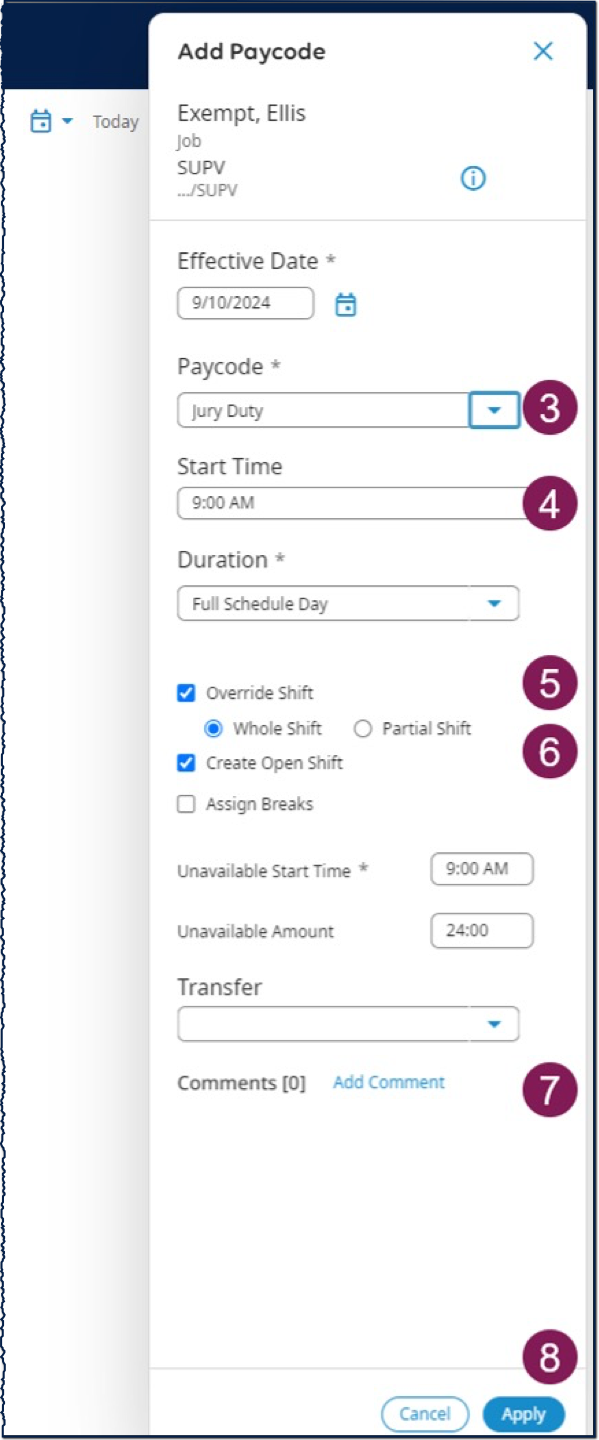
- Right-click the applicable shift and select Add Paycode. On the Add Paycode slider, select the appropriate value from the Paycode drop-down list.
- Select the applicable Start Time and Duration.
- Ensure that Override Shift is selected. Choose whether you want to override the whole shift or partial shift. If Override Shift is not selected, the paycode will be recorded in addition to, rather than instead of, the original shift.
- Ensure that Create Open Shift is selected to create an unassigned shift correlating to the original shift. You can use this later to reassign the shift to a different employee.
- Optionally, select Add Comment to select a preconfigured comment and add notes.
- Select Apply and Save.
How to Add an Assigned or Open Shift
- On the Staffing View Summary page, select the location(s) and job(s) that you want to work with and select Open Selected.
- In the location panel menu, select More and then select Add Shift from the drop-down list.
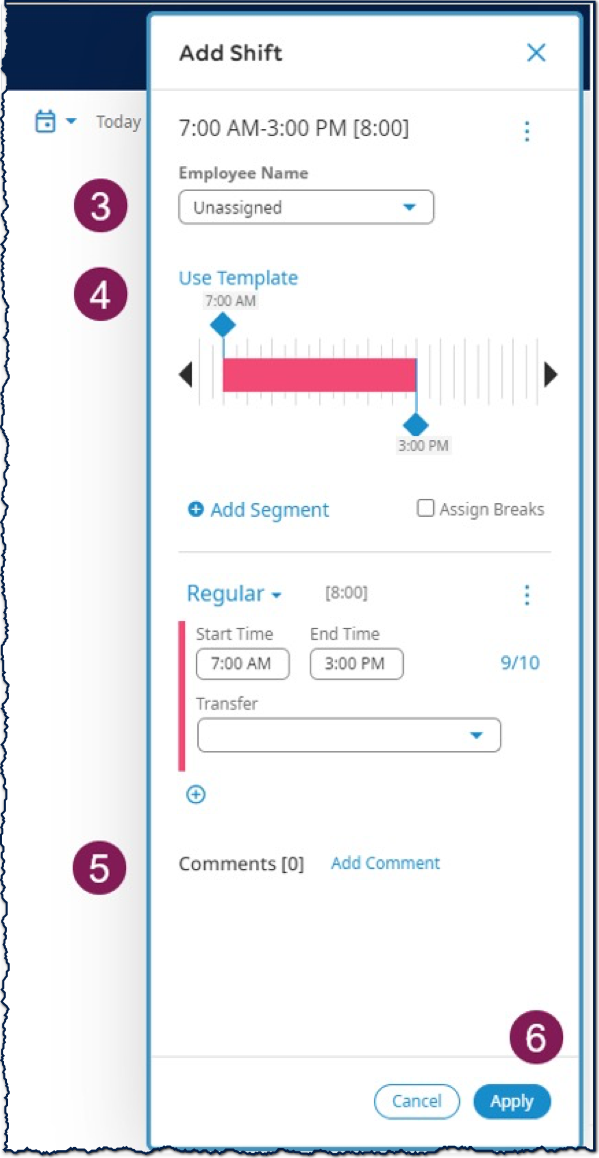
- On the Add Shift slider, select the applicable employee’s name from the drop-down list. To create an open shift, leave the default value of Unassigned.
- Select the Use Template link to select the applicable shift template. Alternatively, under Regular, enter the Start and End Time. If needed, from the Transfer Employee, add the applicable business structure, work rule, or labor category for the shift or shift segment. Select OK then Apply.
- Optionally, select Add Comment to select a preconfigured comment and add notes.
- Select Apply and Save.

How to Transfer Employees Between Locations
- On the Staffing View Summary page, select the location(s) and job(s) that you want to work with and select Open Selected.
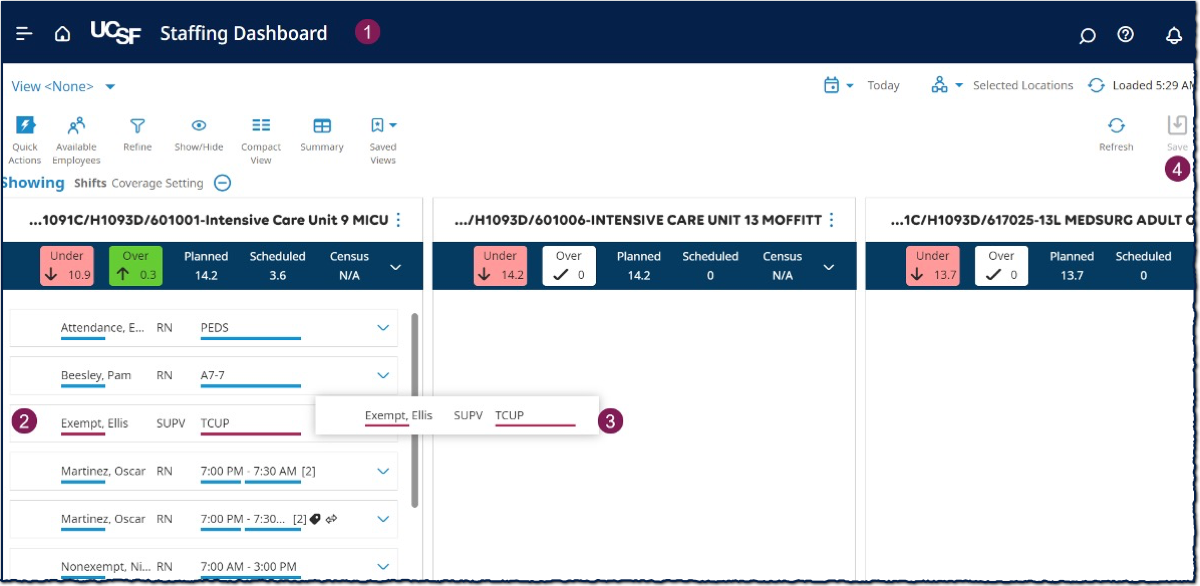
- On the panel of the source location, select the employee to be transferred.
- Drag and drop the employee into the panel for the destination location.
- Select Save.
How to Transfer an Employee from the Available Employees Panel
- On the Staffing View Summary page, select the location(s) and job(s) that you want to work with and select Open Selected.
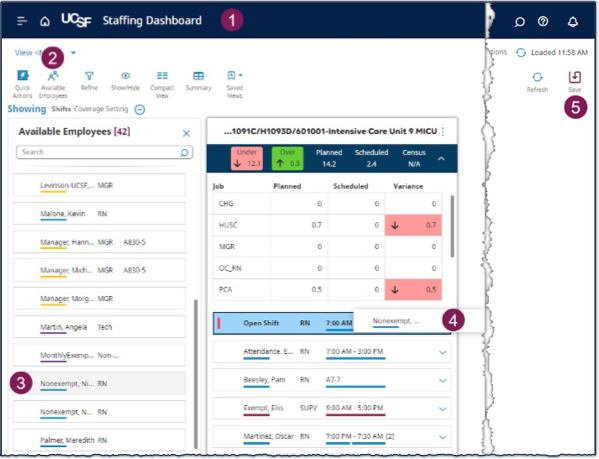
- Select the Available Employees action icon to open the panel.
- Select the applicable employee from the pool. You can use the Search feature to quickly find specific employees.
- Drag and drop the employee to the open shift in the location panel.
- Select Save.
How to Update Shift Times
- On the Staffing View Summary page, select the location(s) and job(s) that you want to work with and select Open Selected.
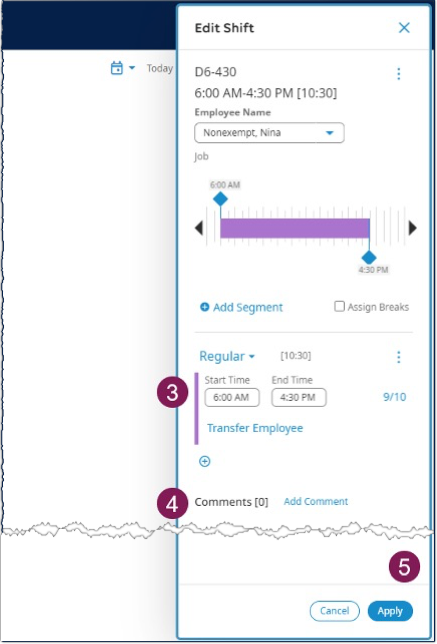
- Right-click the shift and select Edit from the glance.
- On the Edit Shift slider, use the time block start or end handles to extend the times. You can alternatively edit the Start Time and End Time fields in the applicable shift segments.
- Optionally, select Add Comment to select a preconfigured comment and add notes.
- Select Apply.
- Select Save.