Managers and Schedulers can post or unpost a schedule, as well as notify employees about changes to posted schedules.
Please be aware if you do not manually post the schedule, the system will automatically post the schedule 2 to 4 weeks prior to the first day of the schedule period.
The instructions in this guide include how to:
- Post a schedule using a Quick Post
- Post a schedule using the Manage Schedule Posting panel
- View posted and unposted schedule details
- Unpost a schedule
- Notify employees of posted schedule changes
Using Quick Post to Post and Unpost Schedules
When a manager posts part of a schedule, employees can see the posted part of the schedule and can request changes to that part of the schedule.
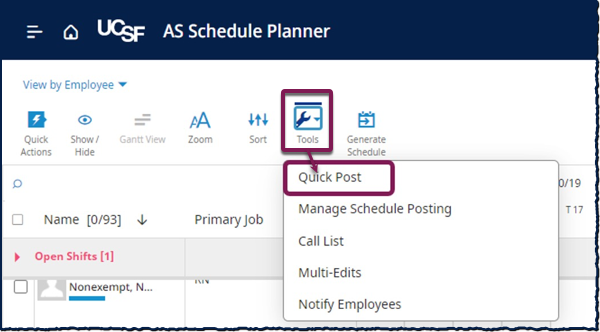
You can use Quick Post to post the loaded time frame and location.
- From the Main Menu select Schedule and select the schedule you want to work with.
- Select Tools.
- From the Tools drop-down list select Quick Post.
- When a warning appears, select Yes to post the schedule for the selected locations and jobs for the time period.

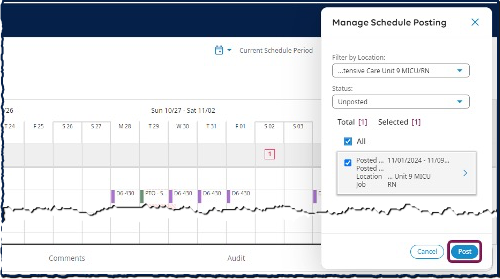
Post a Schedule Using Manage Schedule Posting
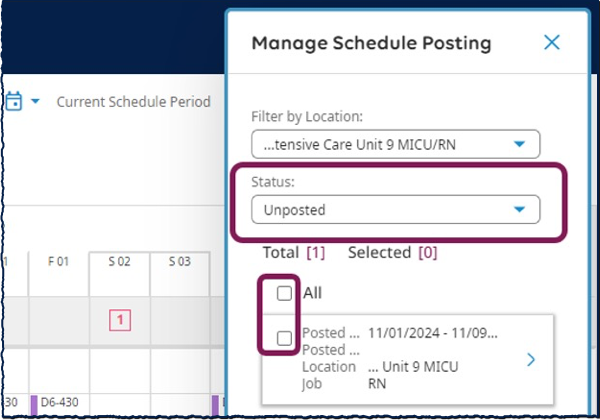
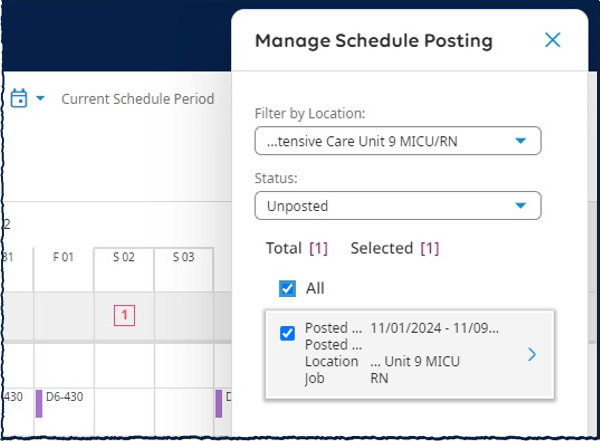
The Manage Schedule Posting panel displays posted or unposted schedules for the loaded location and time frame.
The location is the same as the location currently loaded.
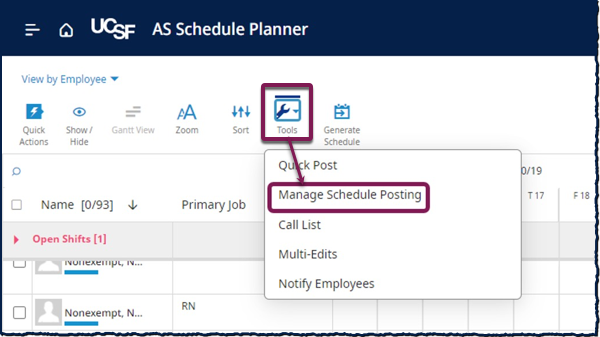
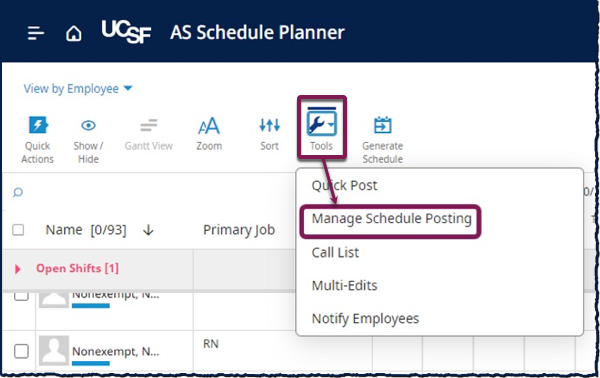
- From the Main Menu select Schedule and select the schedule you want to work with. From there navigate to Tools.
- Select Manage Schedule Posting.
- From the Filter by Location drop-down list, select a location.
- From the Status drop-down list, select Unposted.
- Select the All checkbox to prepare to post all the listed locations or select one or more checkboxes to prepare to post only specific locations.
- Select Post.
The system posts the selected schedules.
How to Unpost a Schedule
When a manager unposts a schedule or part of a schedule, employees no longer see that part of the schedule and cannot request changes.
You cannot unpost schedule dates in the past. The loaded time frame must not include past dates.
- From the Main Menu select Schedule and select the schedule you want to work with. From there navigate to Tools.
- Select Manage Schedule Posting.
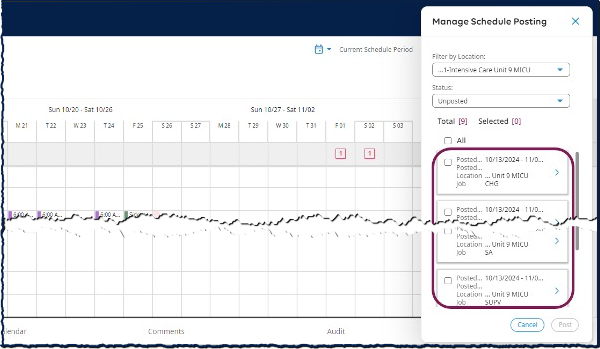
- From the Filter by Location drop-down list, select a location.
- Choose a Posted Schedule. Select either the All checkbox to prepare to unpost all listed locations or select one or checkboxes to prepare to unpost only selected locations.
- Select Unpost.
The system unposts the selected locations.

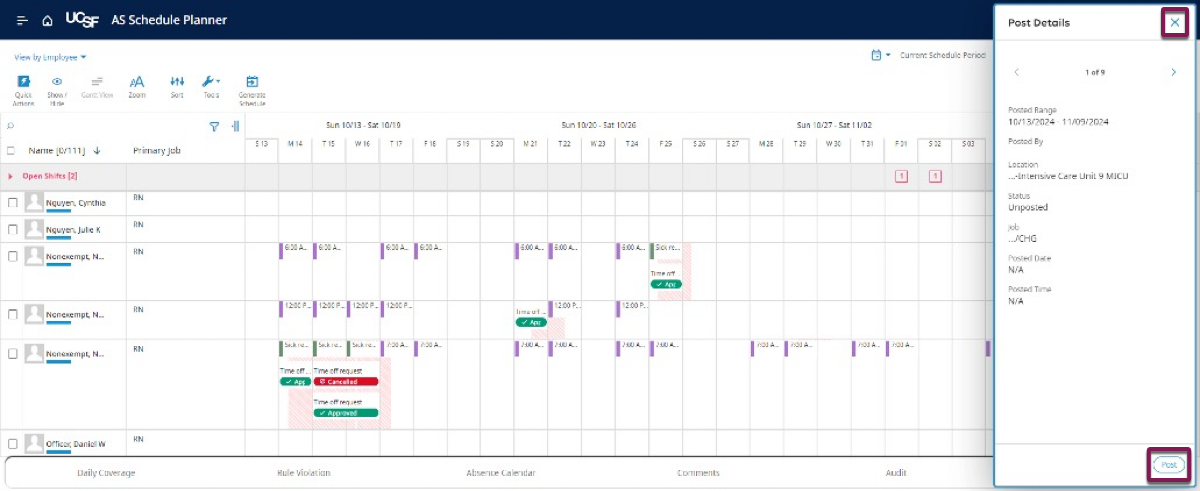
How to View Posted and Unposted Schedule Details
You can filter posted and unposted schedules by location to view schedule details.
- From the Main Menu select Schedule and select the schedule you want to work with. From there navigate to Tools, then Manage Schedule Posting.
- (Optional) From the Filter by Location drop-down list, select a location.
- From the Status drop-down list, select a status.
- (Optional) Select the right-facing arrow on a slide out to view additional details in the Post Details panel.
- Select Post (or Unpost) at the bottom of the panel to post or unpost that that location’s schedule.
- Select X to close the Post Details panel.
- Select Cancel to close the Manage Schedule Posting panel.
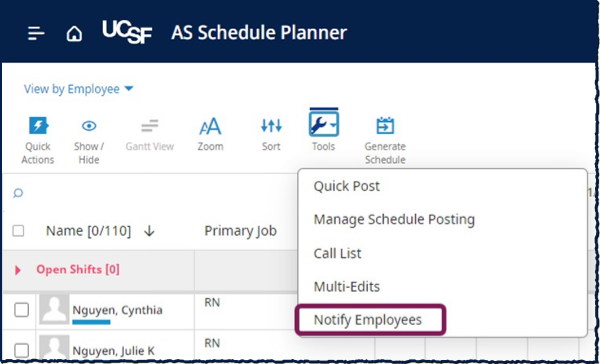
Notifying Employees of Posted Schedules
There are several ways to notify employees when you change a posted schedule.
- From the Main Menu select Schedule and then the applicable Schedule Planner. From there navigate to Tools.
- From the Tools drop-down list, select Notify Employees. A warning message will appear.
- Select Yes to send the notification.
- Select No to cancel.
Note: Some systems are configured to automatically send notifications to all employees affected by a schedule change or to not notify employees at all.
- (Optional) Use manager-controlled notification to change a posted schedule. A warning message appears.
- Select Save & Notify to save the schedule changes and notify employees.
- Select Save & Do Not Notify to save the schedule changes but not notify employees.
- Select Cancel to discard the schedule changes. Notifications are unnecessary.