This guide provides step-by-step instructions for completing a PeopleSoft journal to properly offset student tuition and fees. To enter an offset journal, you will need the following information:
- The required chartstring(s)
- Student name(s) and UCSF Student ID(s)
- Amount(s) of the offset(s)
- Term to offset
How to Log into PeopleSoft and Navigate to the Create/Update Journal Entries Page
- Log into MyAccess (opens in new window) (not shown). Scroll down to locate and select PeopleSoft Financials from the application menu. If you have set MyAccess to display "Favorites", you may need to change to "All Apps" or search for PeopleSoft.
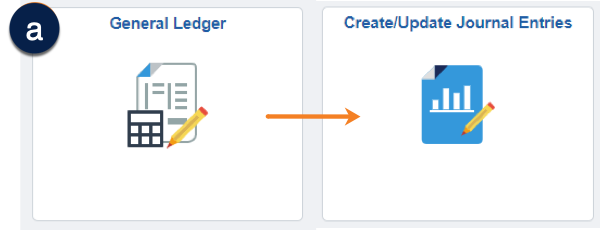
- Click on the General Ledger tile, then on the Create/Update Journal Entries tile . The Create/Update Journal Entries page displays.
How to Begin a New Offset Journal
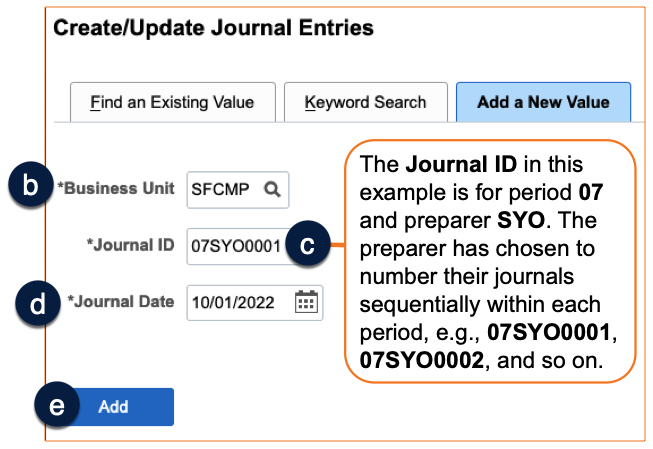
- Enter the correct Business Unit (defaults to the Business Unit set in your PeopleSoft System Profile) .
- Enter a Journal ID , using the UCSF preferred "XXABCYYYY" format, where:
- XX = the fiscal period of the journal (e.g., 01, 02, 03)
- ABC = your specific 3-character Journal Preparer ID
- YYYY = a sequential numbering scheme of your choosing
Overwriting the default of NEXT allows you to locate your entered journals on the Find an Existing Value tab. Using this preferred method, you can easily change the Journal ID search to contain your Journal Preparer ID ("ABC") to quickly find any journal you have created.
- Enter the correct Journal Date (defaults to current) .
- During the first five (5) business days of a month, you may enter dates in the previous month. Make sure to allow time for journal approval, ensuring the journal posts before month-end close.
- You may enter a date in a future period and save your journal, but you cannot edit or submit it until the period of the selected date opens.
- Click the Add button .
How to Prepare the Header Tab for an Offset Journal
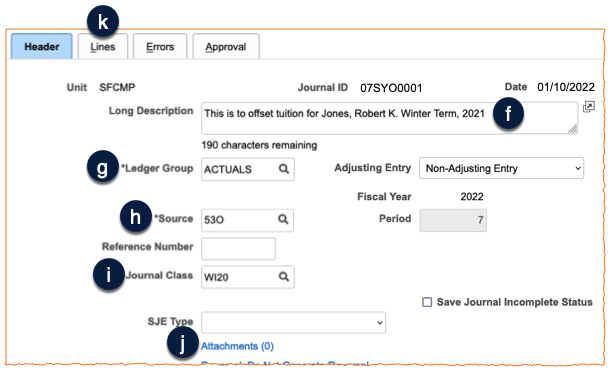
On the Header tab enter the following information:
- Long Description (required) - Enter a description that adequately describes what is being offset so that anyone seeing this description will know exactly why the journal is being entered .
- Ledger Group – should be ACTUALS .
- Source – enter 53O (Letter “O” not zero) to select Student Financial Aid (SFA) Offset .
- Journal Class – select the academic term for which you are entering your journal. When a term is no longer available via the Journal Class selection, Journal Preparers should enter the most appropriate Source code in step 3 instead of 53O .
- Attachments – Click to attach documents as necessary to support the nature and amounts of the journal , then follow the attachment instructions in the next section of this guide.
- Lines - Click the Lines tab to enter the financial information for the journal .
How to Attach Supporting Documentation on the Header Tab
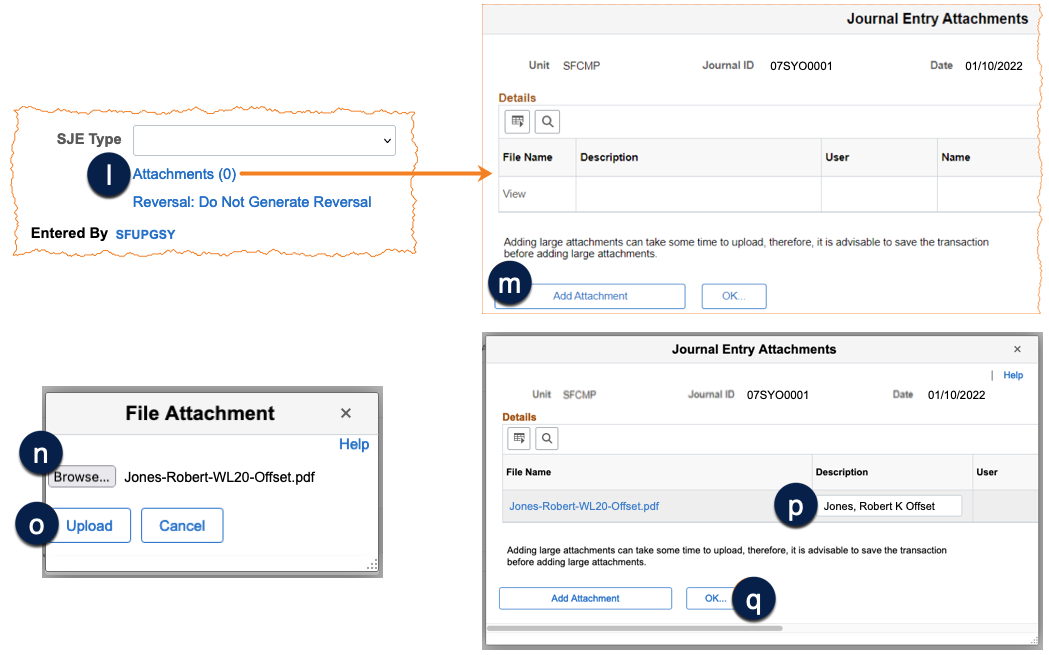
- Click the Attachments (x) link from the journal header tab (x = the number of attachments that have been uploaded to this journal) to attach all supporting documentation that corroborates the journal, which may include: reports from MyReports or another subsystem; email correspondence detailing the journal requirement; and/or any other relevant documents supporting the amount and nature of the journal entry .
- Click the Add Attachment button from the Journal Entry Attachments pop-up .
- Click the Choose File or Browse button (depending on browser configuration) from the File Attachment pop-up .
- (Not shown) Browse for the file you want to attach, select it, and click the Open button.
- Click the Upload button on the File Attachment pop-up .
- Enter a Description of the uploaded document (optional) .
- Repeat steps 2-6 for all other files to be attached, then click OK when done to return to the journal entry screen .
How to Enter Financial Information on the Lines Tab
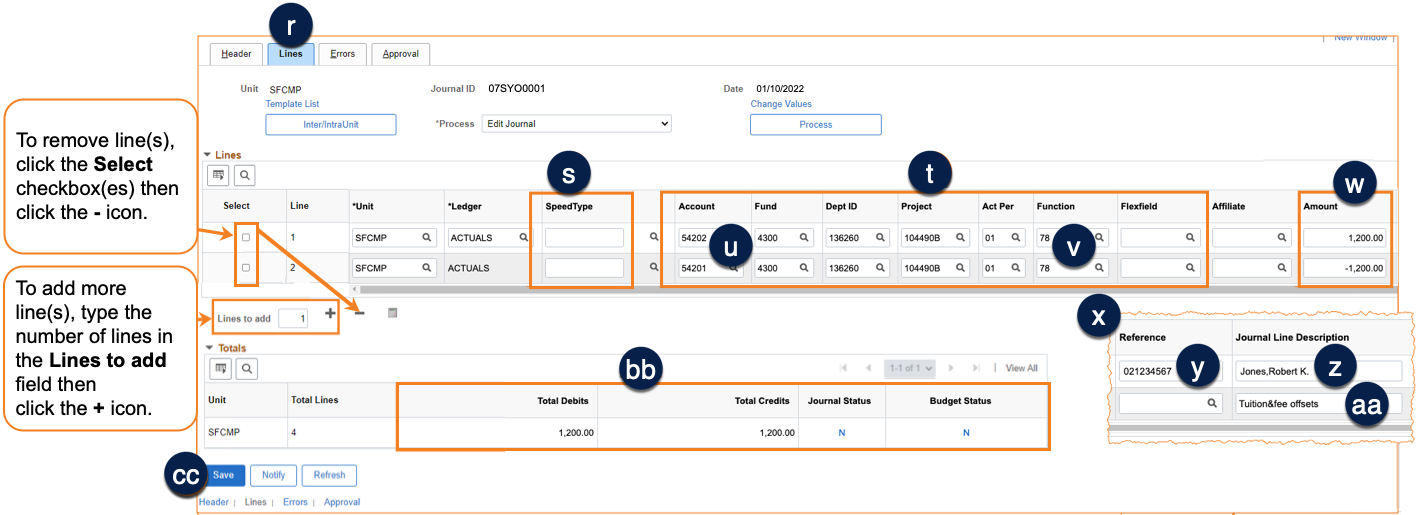
- Click on the Lines tab to enter the financial information on the journal .
- For both debit(s) and credit(s), enter the appropriate chartstrings: Business Unit / Account / Fund / Dept ID / Project / Act Period / Function / Flexfield
- Enter the SpeedType (if applicable) , OR
- Enter the appropriate Chartstring information .
- There are only two Accounts you can use with an offset journal . For debits (+) for students, use 54202 (default Account for any newly added offset journal line). For offset credits (-) enter a separate 54201 Account line.
- If the offset is between two different Funds, you must enter both debit Account 54202 and credit Account 54201 lines for each Fund. Chartstrings in the debit or credit lines should be the same except Account.
- Function must be 78 (Student Financial Aid) for offset journals .
- Enter the Amount for each line . (see instructions in the screenshot captions for adding additional lines)
- A Debit (e.g. 2000.00) increases an expense or decreases revenue or net position transfers.
- A Credit (e.g. -2000.00) increases revenue or net position transfers and decreases an expense.
- Scroll over to the far right of the screen, where you will find the Reference field for each journal line .
- You must enter a student ID in the Reference field for each Account 54202 line . The student's name populates automatically in the Journal Line Description after selection . Otherwise, the Account description populates the Journal Line Description by default .
- After entering all lines, Total Debits must equal Total Credits and the Journal Status should be N (not edited) . If not, the mismatch must be corrected.
- Save the journal before moving on to the next step .
How to Edit an Offset Journal
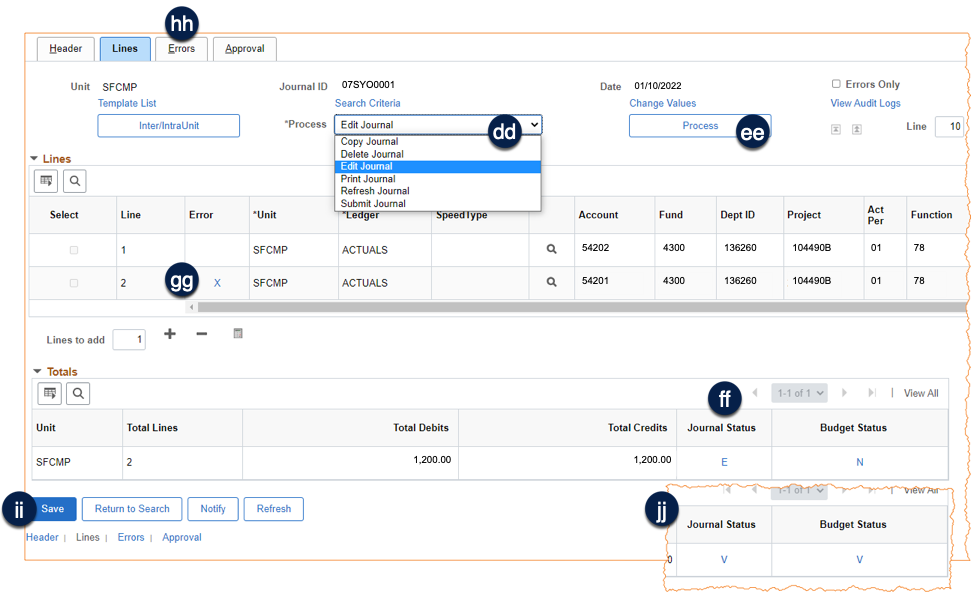
The Edit Journal process must be run prior to submitting any journal, and ensures that:
- All chartfield combinations are valid
- The journal date is in an open period
- Total Debits equal Total Credits
- Click the Process drop-down menu and select Edit Journal .
- Click the Process button and wait until the edit process completes .
- If there are errors, the Journal Status will display “E” () and the lines in error will be marked with an “X” ().
- If you have an error status but no lines are marked in error, this is most likely because Total Debits do not equal Total Credits, or because the Journal Date is in a closed period.
- For lines marked with “X”, go to the Errors tab to review the error description . Refer to the Combo Edit Quick Reference Guide for more information regarding valid chartfield combinations.
- When the errors are corrected, click the Save button .
- Re-run the Edit Journal process by repeating steps 1-2.
- When the Edit Process is successful and there are no errors, Journal Status is set to V (Valid), and the journal can now be submitted for approval .
How to Submit an Offset Journal for Approval and Monitor Approval Status
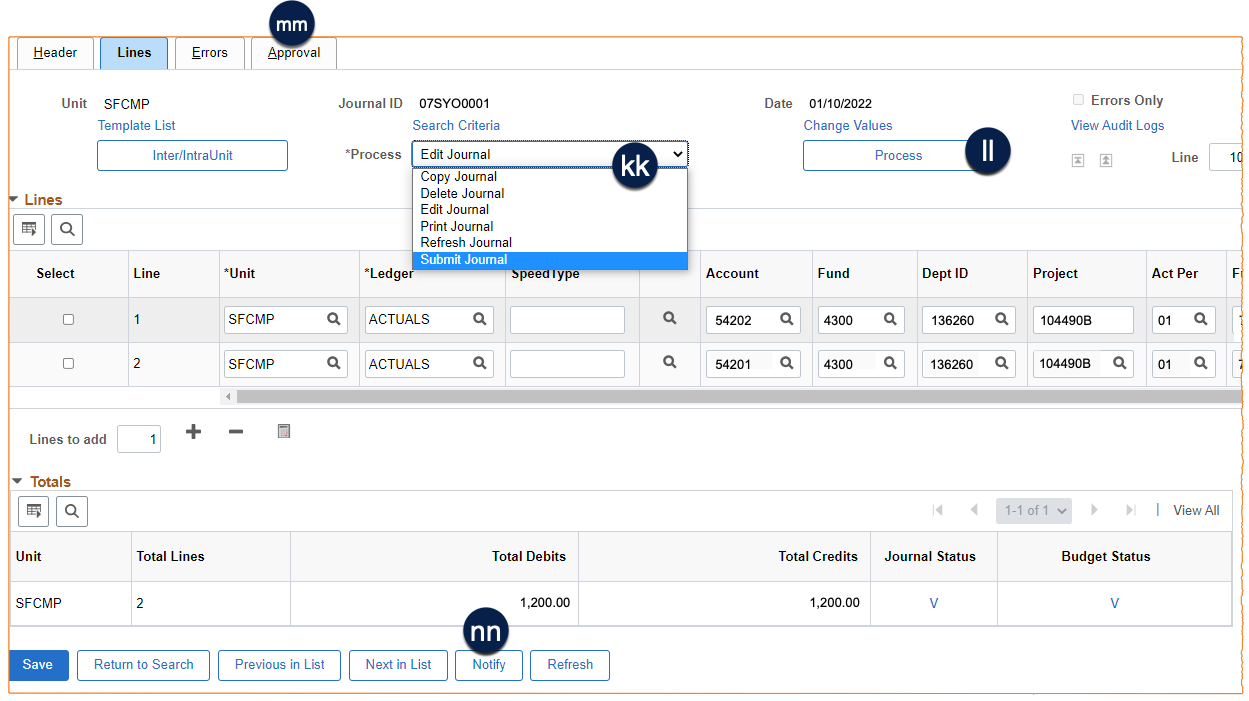
- Change the Process drop-down menu to Submit Journal .
- Click the Process button .
- Click on the Approval tab to view the Approval Status and list of approvers . The journal will be in the first approver’s Worklist until action is taken.
- Click the Notify button at the bottom of the page if you wish to notify the Approver via email .
- Return to the Approval tab at any time in the journal cycle to see the current step of the approval process .
How to Review and Reconcile Offset Journals after Posting to the General Ledger
Review the journal once it has been posted to the ledger to ensure that:
- Charges to Account 54202 are all debits.
- Charges to Account 54201 are all credits.
Reconcile the journal after Student Accounting distributes the fees:
- Account 54201 should have a zero balance, and if not, make sure:
- All students received an offset.
- The correct Fund was used for each student.
- The correct Amount was applied for each student offset.
Tips and Tricks
- Only students active in the current term are available in lookup.
- Make sure the Amount for each line using Account 54202 is a debit (+) and that you assign a Student ID in the Reference field.
- Any offsets between Funds in the same journal require you to enter a credit (-) using Account 54201 for each Fund.
- You may only process one transaction for a single Fund/Dept ID for the same student per day. Any additional transaction for the same student/Fund/Dept ID should be entered using the next day’s date.
- Adjustments using non-53O source codes should follow the general rule for transferring expenses. In such cases Account 54202 would be used for the debit and credit.
- After entering the offset journals as described in this guide:
- An overnight batch posts the journals to the General Ledger.
- On the second overnight batch, the offset is posted to the UCSF Student Information System (SIS).
- Revenue journals in SIS are posted nightly to PeopleSoft.