Use the Workload Planner in MyTime Advanced Scheduling to create, view, and edit staffing plans. For each location, the staffing plan displays the number of workers that are needed for each shift or zone and job.
You can import the staffing plan or enter it manually for each location, job, and shift or schedule zone.
This guide is intended for managers in departments using MyTime Advanced Scheduling and provides step-by-step instructions on how to view workload in the Workload Planner and update the plan and patterns.
Using the Workload Planner
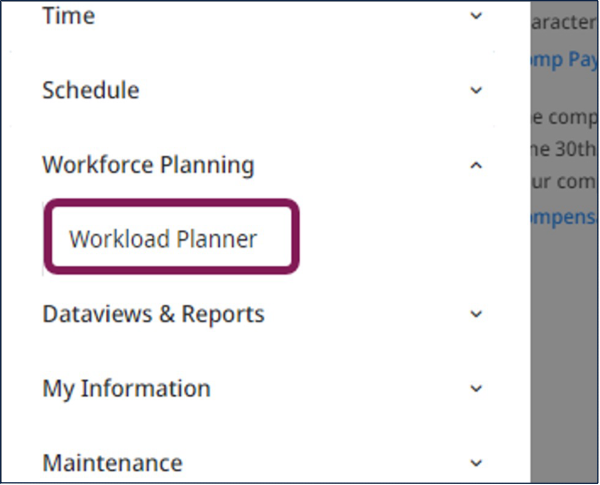
- On the Home page, select the menu button on the top left. Expand the Workforce Planning header and select Workload Planner.
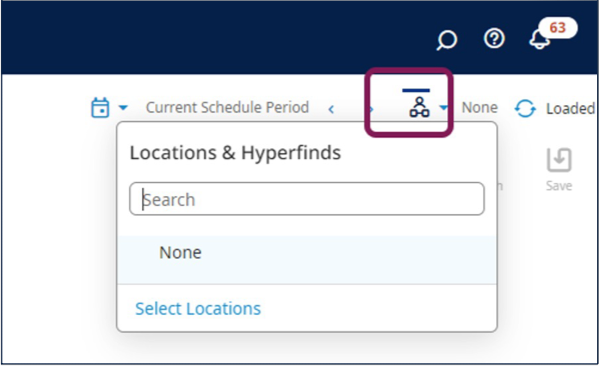
- On the Workload Planner page, select Location Filter.
- In the Location Filter slider, select the applicable location and select Apply.
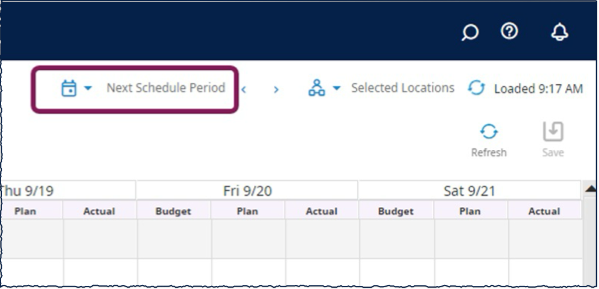
- In the Workload Planner, select the Select Timeframe icon and make a selection. You can either select a predefined period or choose Select Range to define a Start Date and End Date to be displayed. If the time period is too long for the display, use the date range to select different dates.
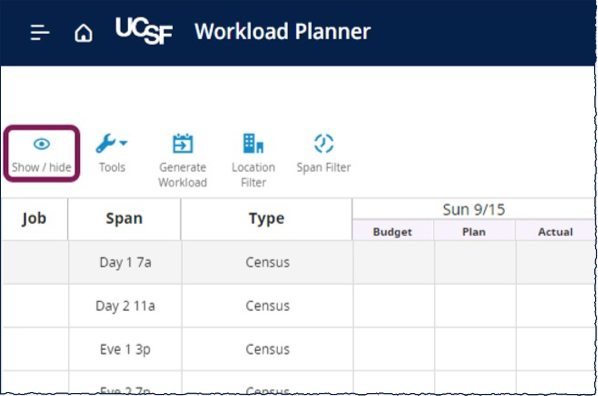
- You can also customize the visible columns and rows by selecting Show/Hide and then selecting the boxes to select or clear the listed options.
- Select the cell you need to change and enter the number of employees you need to schedule. This is a short-term change and will not impact future days’ workload patterns.
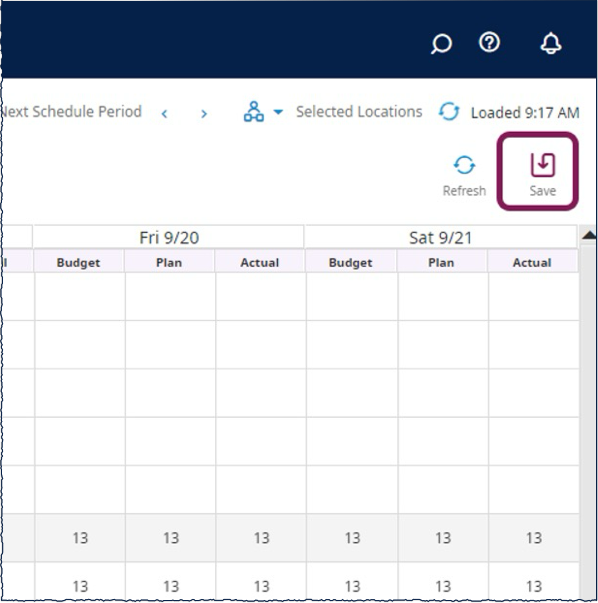
- Select Save.


How to Add Volume in the Workload Planner
- On the Home page, select the menu button on the top left. Select the location from the Location Filter, and then select Apply. Select the span from the Span Filter, and then select Apply.
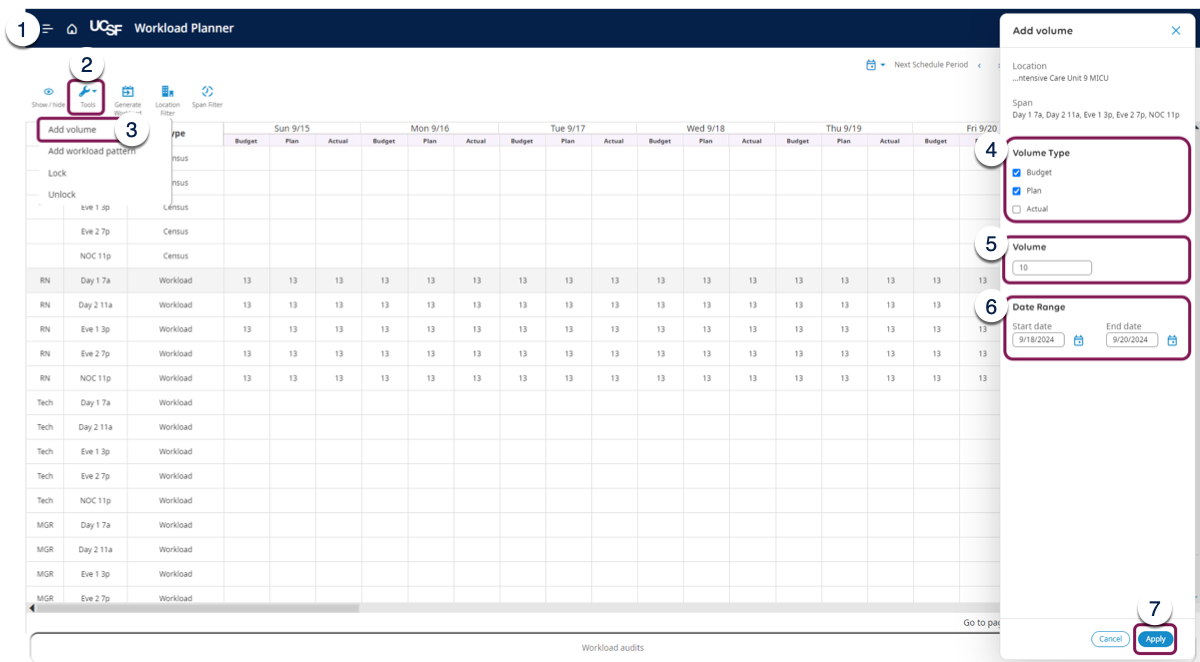
- Select Tools.
- Select Add Volume.
- Select one or more Volume Types.
- At the Volume field, enter the applicable value. You can optionally select the Weight. This option only appears with locations and jobs that have weighted volume configured.
- Specify a Start and End Date.
- Select Apply.
How to Lock Cells in the Workload Planner
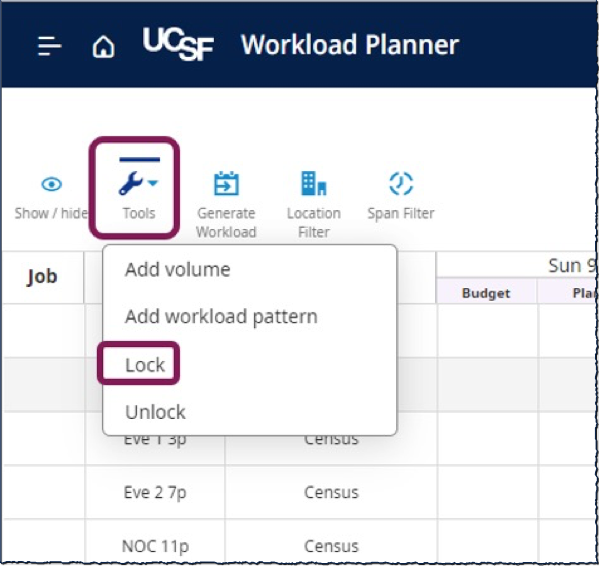
- To lock cells, select a Row and select Tools, then Lock.
- Select one or more Volume Types to lock.
- Specify a Start and End Date.
- Select Apply.
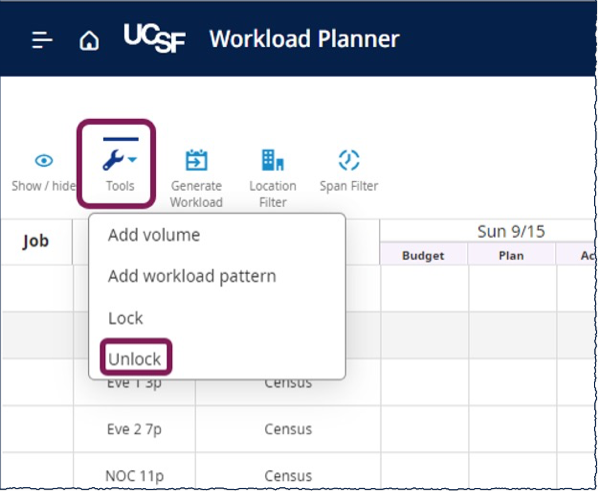
How to Unlock Cells in the Workload Planner
- To unlock cells, select a row with locked content and select Tools, then Unlock.
- Select one or more Volume Types to unlock.
- Enter a Start and End Date.
- Select Apply.